Monday, April 18, 2011


U6b Progress Report

As the following photo's illustrate both models are actually being worked on and actually making progress. The most obvious change is the primer, a very light coat of rattle can automotive stuff which worked very well.  I cleaned the car bodies with alcohol via cotton swabs and then had to go over everything with tweezers to pick off the "hairs".  The paint serves to "blend" everything together and brings out the details like the nbw's on the roof castings. It also brings out the goofs. Not too many, thank you very much, but at least I know where to go to "fix" them.
I got a lot of work done on the underframes, mounting the fuel tanks, battery boxes and jack pads as well as some minor adjustments to the truck mounts. I was originally going to solder up the steps but the thought of making eight of them sounded boring and when that happens I tend to procrastinate.  So I made a rubber mold and cast a bunch of them out of high strength resin.  While it worked, they were very flexible and  fragile and I had to "repair" almost all of them before they were usable. In the end I decided not to use them because they just didn't look right. Back to soldering 6 more sets out of brass.......
The end beams need more work including coupler lift bars (3) and grab irons. The rest of the grab irons will be done using parts out of Presicion Scales bin. Speaking of whom I have a new order going out to those folks soon covering such items as the bells, cab arm rests, air tanks etc. etc.
Some small detail parts have been completed but not installed because painting and weathering has to be completed first.  Things like the cab window shades, these are canvas units on metal frames, made from brass wire and tissue already painted and weathered. You can see the mount holes in one of the photo's.
I have found a source for motors that looks good on the surface.  These are "surplus" high quality motors that are very inexpensive and at these prices I can afford to give them a try.  I'll let you know how this works out.
While it seems like this project is coming to an end I know better. There is a lot of work yet to do. Head down and forge ahead.
Originally one of the goals of this exercise was to build a fairly inexpensive model of an unavailable prototype. I have been having second thoughts about the cost involved.  Basing the whole thing on the Athearn drive system was the best decision I've made so far. Even at that power trucks for both units have cost about $70 including the worm gears and caps. Detail parts have cost over $100 so far and more are to come. The basic scratch building materials ran about $30 but I have enough left to build another unit. I still have to purchase a decoder and sound system for both engines.  This is not cheap!! Considering I bought a Bachmann Shay at Ebay for about $75 delivered, the economics are a little confused.  However, I really enjoy scratchbuilding and there are no models like these available, period. Furthermore, I intend to do this again, I have projects lined up down the road when these are completed.
Truthfully there are mistakes in both of these models. They are far from perfect but then I haven't done this in over 30 years. I have had to relearn a lot of stuff. I have no intention of entering them in any contest and it is unlikely they would win anything if I did. I have never had much use for model contests. Believe me, I know where the problems are with them, I don't need someone else to point them out. I am a much harsher  critic than any contest judge could be.

Sunday, February 20, 2011

These photo's show the progress I'm making on the U6's.  The car bodies are assembled and some detail has been added. NBW etc.  The black lines showing on the underframe are Archer weld beads.  They look great and I intend to add some more. The overhead shot of the underframe is intended to show the Athearn truck retainer clips which work perfectly.....by accident !
The side view of the underframe shows the truck side frames mounted via some brass channel stock.  They are missing the equalizers, springs and spring plates and the sand piping. The equalizers did not turn out very well ( my poor engineering) and I am still mulling over how to proceed.  I need 8 identical pieces so they need to be etched, molded or some such to avoid really needless repitition by hand making each one that would never turn out the same.
The hood ends are resin moldings like the roof and truck side frames and I have fitted a brass door to the end showing. This is an access door for the radiator and cooling fan room. That still needs hinges and handles as do all the engine hood doors. I have made an order to Precision Scale for many small detail parts including those items plus horns, brake wheels and housings, sand filler hatches, headlights and more. Both units should start to look "busy" pretty soon. I've decided on brass angle for the handrail stanchions much like Alco switch engines.  Fairly easy to fabricate and detail and very strong.
The "cab" unit is going to have interior detail.  It is much too open not to. Brake stand, heater, control stand seats etc. painted that weird off green every engine I ever got on was (except the momentary chocolate brown period the SP went through in the late '70's)
The all together shot gives an idea of the "chunkiness" look of typical U6's. There is also an electrical conduit that fits just under the running boards that I intend to include that will visually add to that look.
The end steps are being molded along with m/u drop steps and should be installed at the next update.

U6b B Unit Update


Wednesday, November 24, 2010

Layout Progress

While this image is not very good it will serve as a general view of the overall layout design. The drawing has been erased more times than I care to remember and is still in the process of change.  If you have been following this blog you will recognize that the left side of the sketch has already been modified ! At least you all have an overall view of the extent of the whole layout.
I overcame a major obstacle last week by the removal
of a 275 gallon fuel tank that was within the boudaries of the harbor scene on the right side.
It took the new owner of the tank and me several hours of hard labor to get it out of the basement but it is finally done. I immediately began putting down the sills for the new walls in that section that divides off the water heater and the ancient oil heater.
This is the engine service area around Bridge, Oregon. The scene will consist of mountain sloping upwards toward the backdrop covered with pines and spruce etc. the track and structures in the foreground. I am experimenting with the valance.  The wavy cut is to prevent distraction of a straight line as it will be painted a sky scene exactly like the backdrop.  I am hoping to add depth instead of "framing" the scene in the normal way. If it doesn't work out I'll just remove it and cut it straight and redo it the "normal" way but I think this is worth a try.  Nothing ventured nothing gained. The valance also hides the lighting which I have also finished wiring for this area. Haven't turned it on yet because I don't have the fixtures installed. Yes, that's a outlet box that hasn't been wired .  It comes off the wiring for the room behind the wall (workshop). 

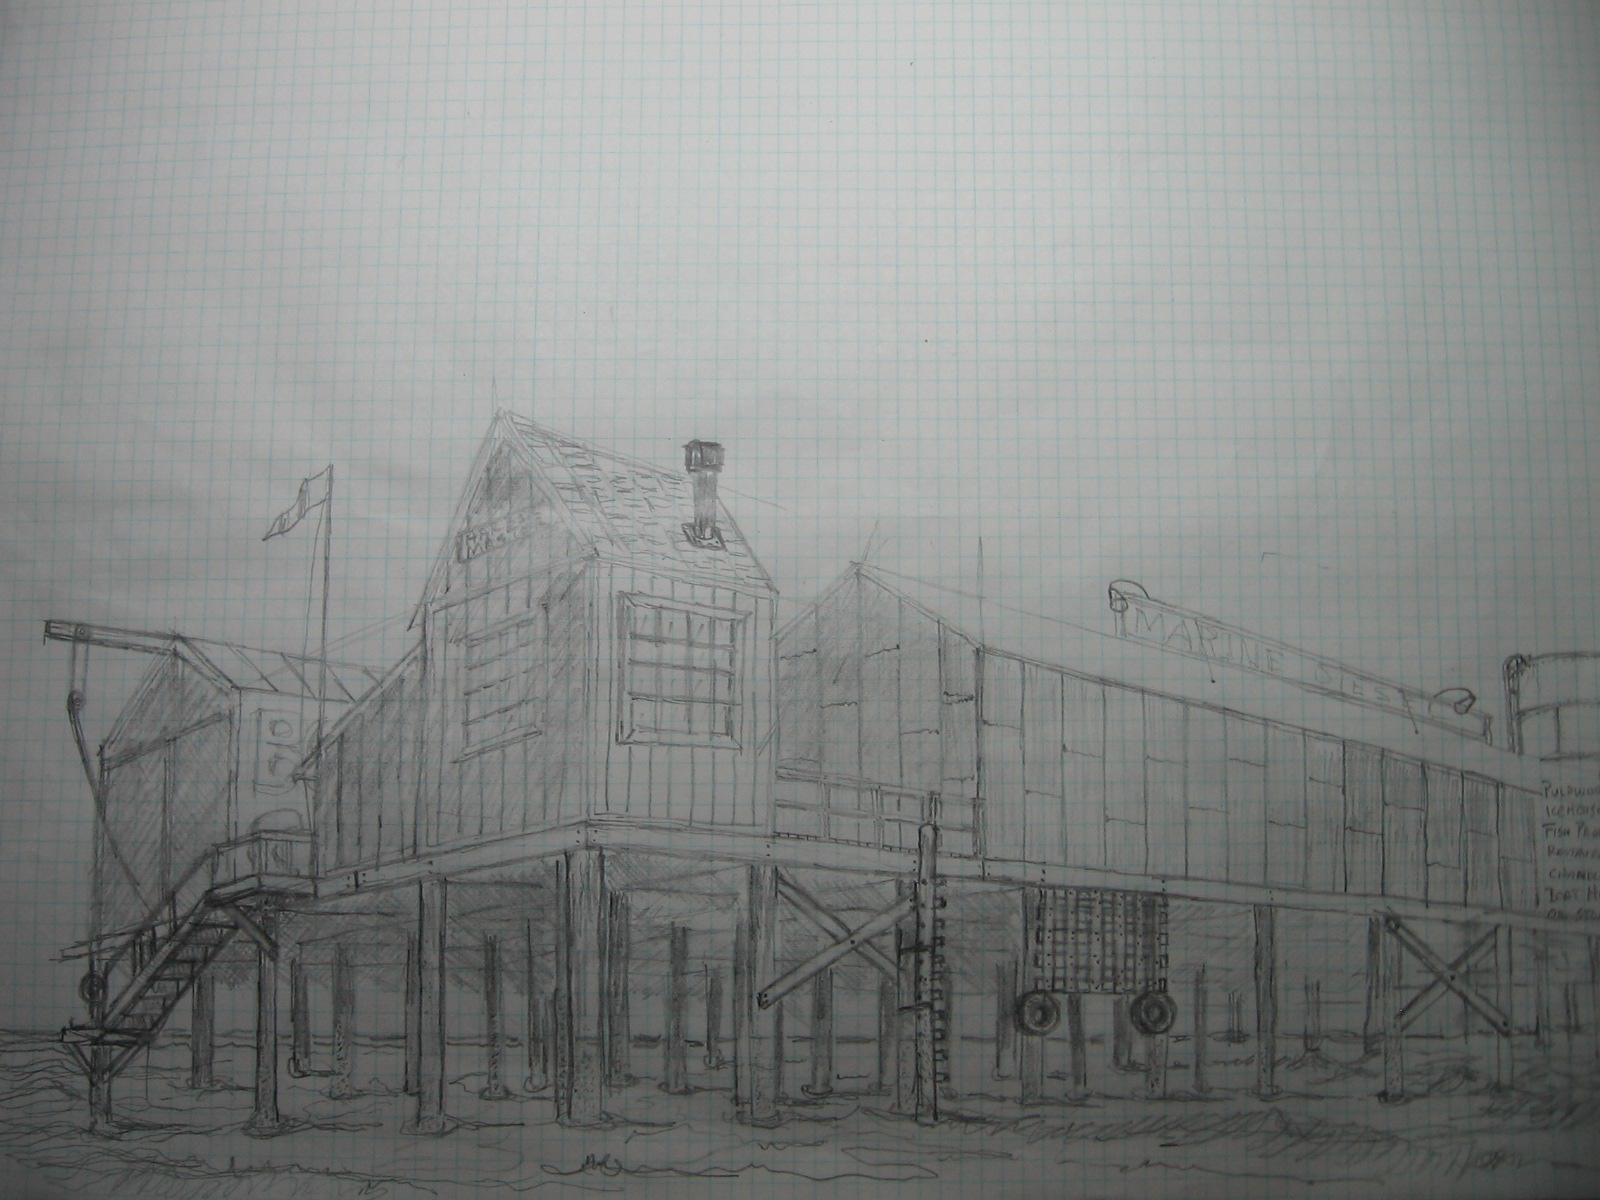
This is a sketch of the end of the wharf at Bandon Harbor.  Just something to tweek the appetite for structure building and visualization.  The module of the wharf is 30 inches by 9 feet ! Lot of stuff to build....
Am I a lucky boy or what? My wife bought me this Bachmann Shay for my birthday!! Can't wait to get at it with the airbrush and chalks to dirty it up a little......

Sunday, October 31, 2010

A Tutorial

The Um6b has a set of dropped grab irons on the side of the unit just forward of the cooling air intake that serves as a ladder to the roof.  They are pesky little dudes to make because they must be as nearly identical as possible. To be otherwise would make the oddballs stand out like a sore thumb. In addition they have to be mounted absolutely vertical and without variation, in line, one above the other. Eyeballing these babies is out of the question, at least with my eyesight ! The solution is a set of jigs and fixtures.  They are simple to make, don't require much time or effort and are cheap.
The first is this simple aluminum angle 1/8" thick by 1"x1" x4" long with a .025 hole that is 17" from the notch filed in the end. This thing makes 18" long grab irons. Bend the wire stock over the notch as far as you can (I use .0225 brass) using your thumb and forefinger.  It won't make 90 degrees so you'll have to adjust it with a pair of pliers.  Use the inside of the aluminum angle as a guide but be careful as all extruded angle isn't necessarily 90 degrees either.  When you buy it check, they won,t mind.
When you get it square, insert it in the hole and line up the unbent end over the notch.  Bend it the same way you did the first bend.
Sorry about the blurry photo but you should be able to see enough to get the idea. The bend should come out about like the next picture.

Square this new bend up with the pliers using the aluminum angle as a reference. When that's done turn the wire sideways and check that it is not twisted. You should only be able to see one wire as in the next photo.  This is critical.  If you get things twisted the finished grab irons will never look right.  Take the time to tweak them into shape.

In the photo below you'll see that I have made two notches in the edge of the aluminum angle. They are 18" apart. Just wide enough to hold the bent up grab iron, because we need to make another bend in both "legs" to get the drop in the finished piece. That bend has to be uniform in length.

As you can see I use another piece of angle to back up the grab iron while it is in the notches and then I use a flat needle file to hold it down and simply bend the legs over the edge of the angle. Voila! Consistant, uniform length bends. You have to make final adjustments to the bend angles with pliers as usual and all the bends must be parallel and square with each other or they won't set properly in the pre drilled holes.  We're not finished yet, because those holes are just as important as the grab irons themselves and we need a couple more jigs to get this done.

This is the drill guide.  It was made from .020 styrene and the cross member from .125 square styrene.  The blade should have been .040.  This was really too flexible but I made it work. Very carefull layout work pays dividends in the end.  I centerpunch my holes with a pin using a magnifying glass and am very carefull to make sure I drill the holes as verically as I can.  If you have a sensitive drill press, use it. These were done with a pin vise using a #74 drill. The thing is glued together with styrene adhesive.  Be absolutely sure it is acurately positioned before glueing.
This is how it works.  Notice the holes next to the guide below the grab iron.  It works!!  I clamped the guide in place with some small spring clamps. Probably a good idea.  If you tried to hold it with your fingers it would most likely drift.

This is the last piece of fixture you need. Simply a piece of .060 styrene about 15" wide to space the grab irons a uniform distance from the surface while glueing. I used CYA from the inside of the car body. If things are a tiny bit out of whack you can bend the wire into shape at this stage.  If it is a lot out of whack, pull the offending grab out and make a new one. When the adhesive sets, pull the spacer out,

and admire your work !  Still needed is the nut bolt washer detail at the top of each leg.

Does anybody really need this? I don't know but it was kinda' fun to do and so I may do some more as I progress with this model.  I notice some strange effects with the photo's. The grab irons are perfectly straight as is the roof line of the engine.  I don't do Photo Shop so don't know how to fix those things.  My wife is good at it so I might have her take a shot at it when she gets some time.  Might not be worth the effort. At any rate, the moral of the story is, jigs are simple and effective and mostly cost very little. Sometimes the effort to think of a way to do them is much more than the effort required to turn out the final product. Sometimes they are the only way.

Wednesday, October 27, 2010

Modifying the Modified

Or in other words Plan "C". You'll note that the car repair facilities have been moved to the yard.  It will be served with dual gauge track . Again, "reach in" and depth allowed for scenery was at the tipping point so I felt it necessary to make this change.  There is also a mistake in the left to right dimension of the room.  It is actually 18" wider than on this drawing. Don't know how that happened but stuff does sometimes. It doesn't effect the overall design. Just imagine the yard tracks with a foot and a half more straight track stuck into the middle. When I am standing in the basement in the middle of this I can "see" the scenery much easier than on the drawing and I think this inability to translate the 2 dimension into three is why I keep having to change things. I also think it is why I look at layout design as sculpture more than an engineering or operational concept.  And this is just the ten foot end of a nearly 40 foot long sculpture.  Yikes!
When I am standing in the middle of this I see sight lines with trees and mountains and strucures and where water is or has been and where the trains must go. Where the lighting must be to avoid weird shadows and the structure to hold it all up. The backdrops are easier to visualize and I can see how other parts of the layout can help backdrop this section to help form a larger vista. I think that is going to turn out to be a key element in the overall impact of this project. The larger vista.

Monday, October 25, 2010

A Tribute to Athearn and A Story About Trucks

I received the worm drive assemblies from Athearn shortly after I ordered them even though they tell you it will be 6 weeks for parts delivery. Never more than 10 days. This time the worm drive assemblies were minus the gear box covers. I say that with some trepidation.  In the exploded view of the SD40 parts diagram it shows the covers as part of the "assembly".  I assumed they were.  When they didn't show up I e-mailed Athearn and asked if they were not part and did I need to order them seperately.  They sent me three new covers  with  a note attached saying they were available seperately for $8.95 a dozen and were not part of the "assembly". Thank you Athearn guys. A nice gesture which won't be forgotten.
This first picture shows how much I trimmed the styrene post I previously glued into the truck frame. It is actually flush with the cross member(Bolster).  I am beginning to think this was a mistake in material selection.  This post takes all the stress of draw bar pull and I don't think it will last very long. We'll see. At this point I was concerned about clearances .  As the next photo shows everything worked out just fine but it IS really close under there.  I cleaned up the u-joint castings just to make sure but there is no intereference.
I did have to make a modification to the gear box cover.  It would not snap shut over the gear tower when I installed the truck in the underframe. If you look closely at the two covers side by side you'll notice that the left one is taller.  I took about .010" out of the right hand one.  It then fit just fine and did not interfere with the worm gear . Previously I was concerned with finding a way to keep the trucks held in place with some sort of a clip arrangement.  Well, you can see by the slightly out of focus fourth photo of the truck mounted with the cover in place that the protruding arms do a very nice job of just that. Athearn to the rescue again!!Some surgery has to be done on the deck to allow swing room for the trucks and more room for the drive shaft and flywheels but this was a good day in the history of these models as I am convinced that they are going to run very well and reliably now without too much further problems.  I still have to deal with electrical pick ups but that shouldn't be too much of a problem.....and then the sound systems, of course.  That's a whole new univeerse for me.

The last photo shows the roof master mounted on a 1/8" aluminum plate.  I ran out of similar thickness styrene so I ran out in the shop and hacked this out of some old airplane stuff I had lying around. Aluminum like this (6061T6) is machineable with woodworking tools, I cut it on my table saw, is very stiff in this thickness and I can debond it if I really want to after I'm done with it . It should make an excellent base for casting. I'm still tinkering with the master, filling small holes and such.  As you can see, all the warp has been removed by bonding it to the plate with CYA.


Thursday, October 21, 2010

New Benchwork

This is the new bench work for the engine service area referenced on the new sketch for Bridge, Oregon. It has been permanently attached to the walls.  New sheetrock work has been accomplished including the "lid".  The front of the bench will be finished, probably with a curtain in this area. Yet to be determined.

Archer Louvered Vents

These are the Archer Vents (Resin castings on decal paper) added to both engines in the appropriate places. (Battery boxes, doors and accessory panels)  While they are not perfect, they are very good and about the only way I was going to get them on these models without making seperate castings from another master and applying them that way.  This is much easier and quicker.  I work slowly and this took about an hour to do both sides of both units.  For some reason or other the vents on the brass substrate looks "cleaner" but I suppose it won't matter when painted and weathered.  I am very happy with this product so far. I'll be ordering some "GE" style tread plate and some more "Weld bead" soon.
Athearn is sending the covers for the worm drive assemblies but I still haven't  received the motors from Micro Mark. It looks like everything is going to fit in the available space but I have some surgery to do on the styrene deck to get clearance for the u-joints and drive shafts.  There is still some question about the main reservoirs which are located inside the cooling air intake screens whether they will clear the power truck "swing".  Hope so, because I'm counting on them to hide the upper gear tower.  When that is solved  I can go about devising a hold down system for the long hood(s).  Some sort of a machine screw and  tapped styrene block arrangement I think.  Engineering on the fly !

Monday, October 11, 2010

The engine service and car repair area benchwork installation

Layout Design Plan "B"

A funny thing happened on the way to installing benchwork under the portion of the layout shown by the previous sketch in this Blog. The switches on the yard lead were obviously out of reach !  So far out of reach that even if I stood on a stool or step ladder I WAS NOT GOING TO BE ABLE TO REACH THEM ! Due to the nature of the basement construction there, it is impossible get to them from underneath.  This is not acceptable. Here is my solution at least for now.  It has given me a chance to rethink this whole area of the railroad too.
  There were too many yard tracks to begin with. There was no engine service or car repair facilities and only one reason for the standard gauge to be there.The wood chip facility.  This new design satisfies those concerns. Too many yard tracks? In the waning years of my employment with big yellow I worked at an outside point that had a 4 track yard.  We routinely switched 100 car trains there daily and built 100 plus car outbound trains without too much fuss. The longest track was about 70 car lengths and we had about a 60 car length lead. Everything else was shorter. Here, I'm dealing with 12 car trains maximum and not much main line traffic. There shouldn't be a problem. If it gets a little tight it just might add to the fun.

This plan swaps places with the geography but adds to the meandering look that I am striving for. It also adds revenue loads for the standard gauge and will make switching more interesting and involved when the local shows up from Coos Bay.

Monday, September 27, 2010

Update

I threw out the old hood roof master and spent a couple days making a new one.  I was never really satisfied with the old one and when I wrote that I was going to have to" splice in a piece " to finish up the "B" unit it was just enough to push me over the edge. The new one is much better with a much better contour.  It is long enough to cover the "B" unit hood in one piece and all I have to do is cut one to fit the cab unit. All the roof details will be added after  casting so I can vary them.  All in all a much better approach. The roof was made with two laminations of styrene and then filled with Squadron Green and White alternately to get the final contour. The Green was applied then filed to shape.  The low spots were filled with White and filed to final shape. The contrasting colors help to determine where and how much to shape the piece. You might notice small gaps in the fit.  There is a slight warp in the piece which will be taken out when I glue it to its backer plate prior to casting the resin pieces.  The styrene tends to warp when worked or glued with solvent adhesives both of which happened in this case.

The drive train components have arrived minus the motor's.  Back ordered, but the flywheels, couplings, driveshafts and u-joints are now on hand. The last thing to aquire is the worm assemblies from Athearn and that should happen within the week.  Really cool, something that runs!!!

Anote about the link to the Layout Design and Construction Page.  There is nothing there yet except an old travel log my wife wrote years ago.  While fun to us you might not find it very interesting or think you got shunted off into cyberspace.  NOT.  There will be stuff as advertised shortly, I'm working on it complete with photo's, it'll just take some time. So hang in there and keep checking back and maybe next time our daughters Seattle trip will be missing and the Oregon Coast Railroad will be in its place.


The pictures show that the models have aquired a fuel tank/battery box combo and the jack pads are attached to the "B" unit.  The cab unit has had a lot of contour work and clean up done to the cab roof and the jack pads are assembled and ready to install. All the pilots are now installed with the coupler pockets but much detailing still remains to be done there.

Saturday, September 18, 2010

New House of Cards

A quick note to let you know I have not been sitting idle. This is another "construct", At least the "B" unit hood is actually "together". Note the pilots are installed also. The hood end is the first one I did and is a throw away, just propped there for the "visual". Note also that the roof is too short for the "B" unit and I'll have to splice an additional piece in there to finish it up.  The door on this end of the "B" unit hood, where the cab would normally be, is an access for a hostler's stand. The unit is almost entirely styrene save for two brass plates that mount the trucks and tie the underframe together. The radiator air intakes are also brass channel and screening. There is much to be done, especially in the area of detailing but little by little it gets there.
OOPS !!!!!

My Bachmann 10 wheeler arrived right on time via UPS. I opened the box and to my horror it was "G" scale !! EEE Gads those things are huge.  I goofed while in a bidding frenzy on Ebay and ended up with a really nice model I can't use.  All those nights researching whaleback tenders have not gone for naught as it is back on the block. You have a couple days to grab a nice bargain........at dummies expense.

Tuesday, September 7, 2010

Layout Sketch

This is a preliminary sketch of the joint standard/narrow gauge yard at Bridge, Oregon. This is where most of the tonnage on the railroad originates and where a great deal of the switching occurs. It is also where a possible continuous run connection might be located. I think a change is already in the works as no human can squeeze between the leaning post and the benchwork so I think I'll just connect it to the post and create a little more real estate.  I really don't like using hatches but in this case I don't see much of an alternative.  Without it, there is no access to the far reaches of the layout.  If I move the track further in I waste much valuable space.  Space I fought hard for as it overhangs a retaining wall and it took much effort and expense to take back from the "dungeon". You can see now how I am going to carve away at the benchwork shown in the photo in order to create "operator " space.  Also note that there is a "test track" branching off of the lead that will be dual gauge.  It punches through the wall and emerges in the workshop ending up right next to my workbench. Not bad for an amateur.  Now, to see if it will actually work!!!

More layout stuff

This is the Chief Train Dispatchers Office.  It is also my workshop.  There is a built in workbench behind the window.  I put this stuff here by framing these walls because there are heating ducts hanging down very low inside that can't really be moved and the space isn't much good for anything else, layout wise.  There will be a door where the sheetrock t-square is hanging. The railroads name above the window and a fancy chalkboard to the left.  Should look pretty cool when everything is trimmed out.

Crooked Post Junction

Yes the post is crooked, but it has been there for 85 years and has not failed yet.  I chose not to mess with it. This is the joint standard gauge/narrow gauge yard at the black sand mine loading facility.  This benchwork will be cut and added to .  The yard itself will bend around into the alcove where the plywood walls are and the lead will continue clear around 180 degrees to the town of Bridge. More of the yard will extend out to about where the picture was taken. Reference the drawing.

Layout progress

The basement is undergoing transformation, albeit slowly.  Sheetrock is nasty slow work when you are basically alone. No thing that looks like a functioning layout is yet in place though I can see it in my minds eye. I have included some photo's and a small sketch of the proposed track plan for the area shown.  The master drawing that I started with has already undergone it's own transformation and you will have to wait for a really good clean up to understand what's going on.

Basically I have changed from the desert scenery to mountainous forested Oregon but still retaining the original concept of a non railroad corporate entity owning the operation.  This time instead of salt the commodity is black sand, a material full of heavy metals and common in this area.  It follows that former logging lines might be the venue to haul this stuff to the ocean to exploit overseas markets. It will be much easier for me to reference scenery work out my back door than to try to remember what Tucson looked like. And there are local American Indian tribes here who are involved in the community economy in a major way.  It lays the foundation for a similar scenario to the original Tucson and Baja Northern story.
The time frame is now, always moving forward.  However, I would like to use a minimum of structures and vehicles so that I can change era's by simply taking the diesels and rolling stock off the layout and running my Shay's and Ten wheelers.  Maybe a K-27 with a whaleback tender.  I'm an old Espee guy, remember, and if I can find a way to tick off the purist's out there.....I will. LOL.  You got to have fun with this stuff.

The angled compartment aft of the cab houses the air compressor...I think.

The pilot is still just propped in place